For fun, here are a few of the early renderings and photos of the finished house.
Design


We passed the LEED AP Exam!

LeedLogos
It's been a little quiet here on the blog as we've been busy studying.
LEED for Homes was still in the pilot testing while we were building our house, however we did make a significant effort to make the best of site orientation and use green materials wherever we could. To familiarize ourselves with more of the details of LEED, we decided to pursue accreditation. Now we are officially accredited professionals!
During the design process we relied on a few good internet resources for viable green products and systems. One of the best is Building Green (the publishers of the excellent Environmental Building News).
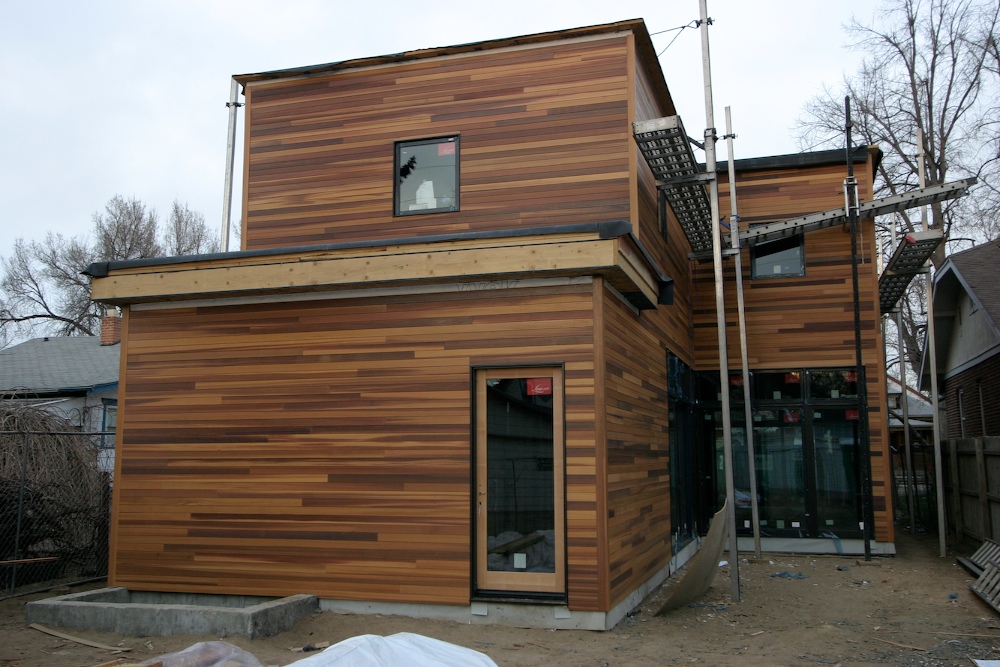
Siding - Horizontal Cedar
in Cedar Siding, Design, Exterior, Materials, Siding
The Haida cedar siding has arrived from the staining shop. Nicholas and his crew started installation right after completing the door and window installation.
We are getting our heads around the fact that the “representative” samples we received from the stack aren’t that spot on. Considering our entire house is being covered with this stuff, its character will define it. Unfortunately, there are some very, very dark pieces and a significant number of them. We were trying to achieve a more uniform and lighter look.
Nicholas has been dutifully blending the batch, but the outcome on the first two elevations is very stripey. Some may see it as adding a richer character to the exterior, however, we had always envisioned it being a clear and even color throughout. Nancy will explore some additional staining options - maybe we can tone the spectrum of color down a bit.
Other than being extremely wasteful (ordering a lot more than we need and picking through it), I don’t see many other options to getting a single color product from a mill.
3D Landscape Review
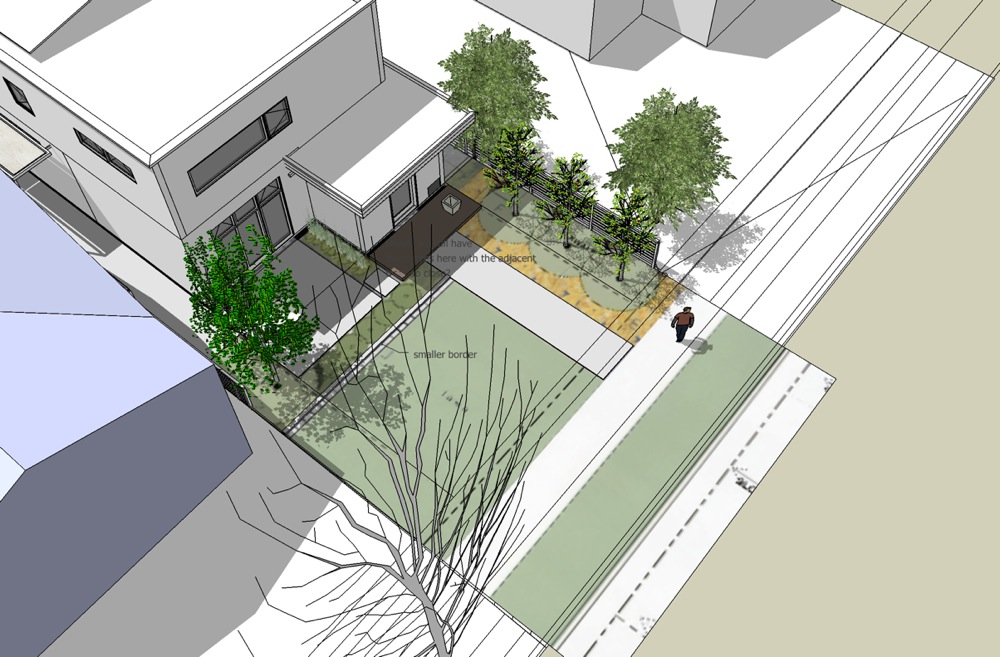
Since we have so much of our project already modeled in 3D, it was nice to build a few of Ransom’s landscape ideas into our model and test them out for scale and composition. As we talked about earlier, it really comes down to vetting ideas as much as possible in 3D, building a real world mockup as often as possible, and only then setting the crews loose on a particular part of the project.
It’s a luxury that not every project can afford, but since it’s only time and energy for us, we want to make sure it is right from the start (then not complain or make revisions as it’s getting built).
Built-in Mockup

Nancy and I spent some time over the holiday weekend mocking up the built-in along our living and foyer walls. Scale is so important - until you build a full size mockup, sometimes it’s so hard to get a true feeling of what something on the computer is going to be like in real life.
We made quite a few adjustments, and will now document this for the trim carpenter.
Landscape Design

Ransom of R-Design put together a great presentation for the landscape.His initial ideas seem to follow what we are looking for: A simple modern plan that will be easy to maintain and incorporate playful areas for the kids. The outdoor spaces we are working with are so small that fitting everything in can be a challenge (while at the same time striving to keep it simple). We have also been checking out some of the species Ransom is recommending to get a better feel of how they would fit into the outdoor “rooms” within our site.
Landscape

We are happy to have found a local landscape architecture firm that has worked on many modern residential projects in the Denver/Boulder region.
Ransom Beegles with R-Design is on board to help us nail down some good landscape ideas. We’ve been so focused on the architecture, and now we’re excited to come up with a landscape plan that will tie into the house design and merge it more gracefully with the site.
Check out R-Design’s projects here: http://rdesignstudios.com
Break Metal Work
in Breakmetal, Design, Exterior

Jerry’s crew from CO Metal Source has installed all of the parapet and the first two sections of the fascia on the lower roofs. Some areas need tweaking, but on the whole, it’s coming out very nice!
This is really the last finishing touch on the exterior other than landscape. The Galvalume is a wild finish. It changes dramatically depending on the daylight - in can vary from a very light silver all the way to dark gray. If you check out the close-up, it even has a “grain” to the finish which gives it further character.
Siding-Take Two


Much better now. We lost some sleep over this siding thing. The contrasting stripes were getting to us. Nancy and I spent a considerable amount of time sorting the entire stack of pre-stained clear cedar and sorted it into light, medium, and dark.
We suggested that the guys mix the two lighter varieties on the front and north elevations. The result is a more subtle appearance and much more palatable to us.
Numerous people said they liked the “character” and “richness” of the dark mixed in, but there was just a little too much of that for us! Another point that was made, is that by year two, the colorado sun will have this wood bleached out anyway...A big thanks to Nicholas and his crew - they did a fantastic job on the remaining areas of siding.
You’ll see the color differences depending on the location of the sun.
Siding Samples
in Cedar Siding, Design, Exterior, Materials
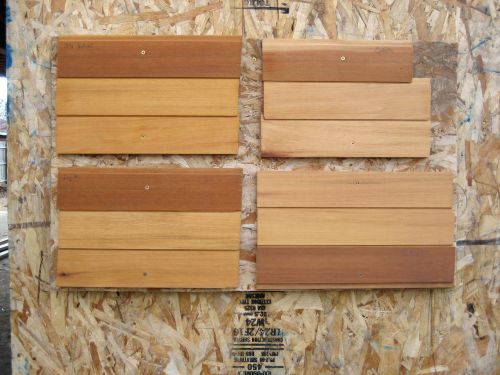
For many months we explored combining different materials on the exterior - mostly stucco and cedar. However, we decided to simplify in order to achieve a subtle more understated look. Ultimately we selected a simple tongue and groove western red cedar board with a very small exposure - similar to flooring in width. We will place this horizontally around the entire house. We purchased this clear smooth cedar from Haida.
The boards have been delivered to a local staining house, and we ended up selecting Sikkens “Natural Light” - the lower right-hand sample above.